
Hello and welcome to yet another week of game development for the game Amenti. This week we tried to set up our server and source share of our UE 4 level. It unfortunately did not end up as planned and a lot of time was spent on making it work. Even though we all had the same brand of computer and were on the same network, it only worked on some computers. In the end, we got it to work, but it took up the whole week to fix. This also made it impossible for the artists to re-create the level design with our placeholders as planned.
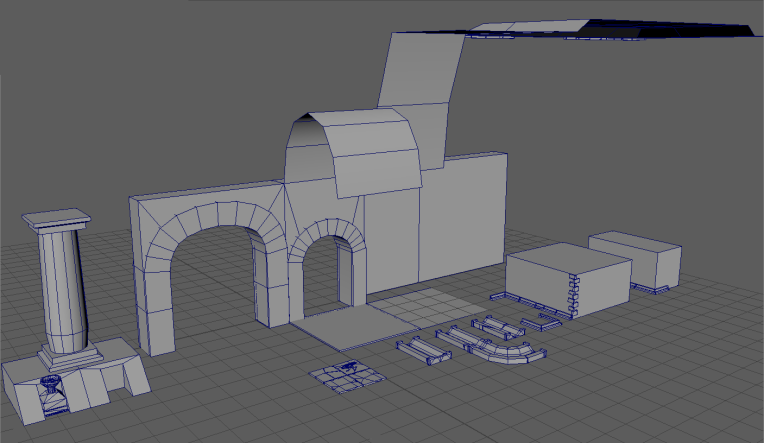
Speaking of placeholders, after fixing our main character and preparing it for animation for our Tech artist Kevin, I spent the rest of the week to block out our environment assets which we had listed on our Asset list. All the decorative pieces were based on concept art by our Concept artist Gustav Larsson which was supplied during the previous and the current week. The modular pieces were thought out by me and our Producer/Artist Thea Falkenmark. Down below you can see some of the pieces made this week.
In preparation of making the assets, I went through a lot of tutorials and documentations to learn how to make modular pieces. So, when making all the parts I made sure to keep their boundaries inside the grid (changing the settings to meter and fitting to unreal), so to make it tillable and not having lots of tiny gaps when tiling them. Another big important part was the placement of the pivot points. To make sure that things like walls have the pivot in the exact same position. Things like small decorative things have the pivot point in the middle of the mesh. But things like modular pieces have their pivot points at their extremities and points of contact with other parts. Down below is a reference of one of my asset’s pivot point.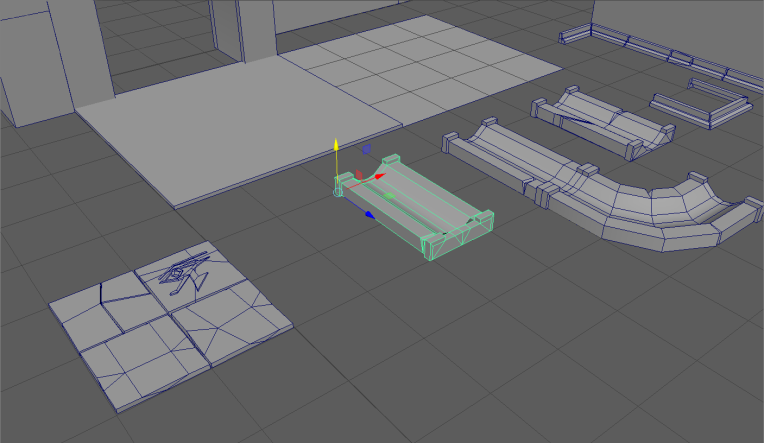
I created all the modular parts in the same file so I could reference their sizes and make sure that all pieces didn’t just look good when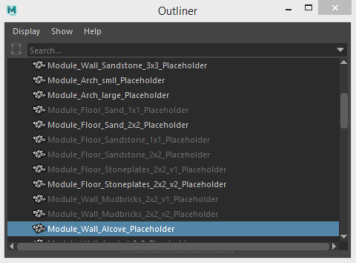 viewed individually but good when tiled. When modelling I also made sure to name all the parts correctly, for example my modular piece Wall Alcove was named Module_Wall_Alcove_Placeholder. This is not only to keep it more organized (you should always name your parts so it’s not full of Box1, Box2, Cylinder1) but for also being exported with the script I’m using (download link to the Maya python script https://gumroad.com/l/AAtzf#). This script moves all the parts to the middle of the world (based on their pivot point) and exports every part separately as a FBX named after the named parts in the program. When modelling I also used the power of two and exact measurements, so that all pieces could fit together in different ways. Below is a video where I showcase one of the modular pieces, the gutter, and show you the many ways you can put together the parts (rotating them, flipping, duplicating).
Aaaand that’s everything for this week! I hope you have a nice day and that you pop by again another time.
